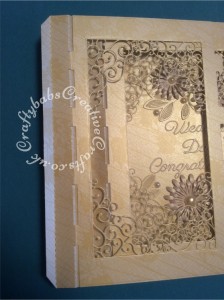
Tutorial 7 – 3D Frame Panorama Card
I have had a number of requests asking how I made this card, so here is the tutorial. I used a set of dies by Tattered Lace to create the card base but am aware that many crafters may not have this die set so I will explain each stage of the card both using the dies (a) and also the alternative method without them (b). It’s also worth bearing in mind that all of the dies I have used can be substituted with other dies you may have or even left off all together. Shop bought flowers, toppers and/or embellishments could be used instead. Note: Equipment and materials needed will depend on what dies you have and your chosen colour scheme. I have listed all of the ones I have used and then give suggestions for alternatives to specific dies.
If you want to see larger versions of any of the pictures just double click on the image.
For this project you will need the following;
Equipment:
All versions:
- Guillotine/paper cutter or craft knife and steel edge ruler.
- Scoring tool/bone folder
- Pencil and eraser
- Ruler
- Ball embossing tools to shape flowers, 2mm, 3mm, and 6mm
With specific dies
- Large A4 format Die cutting Machine
- Tattered Lace – Large Panorama die set including nesting rectangles
- Tattered Lace – Double delights adore and Sparkle corner dies
- Spellbinders – Blooms 1 and flourish from Flower bundle set.
- Britannia – Sentiment dies
Alternative without panorama dies
- Card making score board with 1/2″ increments (if not using Panorama die set)
- Nesting rectangle dies suitable to fit into A5 rectangle to cut apertures. Can be hand cut using craft knife and a ruler
- Flower, embellishment and sentiment dies or shop bought flowers, embellishments, peel off sentiments etc.
Materials to create examples shown
- Card Base – A4 300gsm patterned cream & gold pearlescent card x 3 sheets, or any card of your choice
- Lace embellishments – A4 250-300gsm cream pearlescent card x 1, (not needed is using shop bought alternative)
- Flowers and sentiments – A4 250-300gsm white pearlescent card x 1 (not needed if using shop bought alternative)
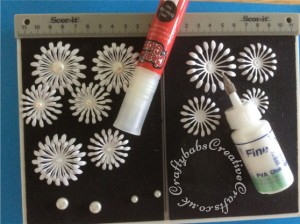
- Good quality PVA glue with fine tipped applicator
- Anita’s 3D gloss or glossy accents glue for adhering flat backed pearls
- Flat backed pearls in cream/ivory 2 x 10mm, 2x 5mm 10 x 4mm or smaller
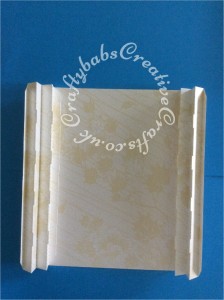
Step 1 – Card Base back and front All Versions
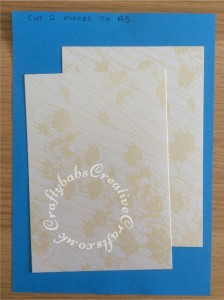
- Using a guillotine or ruler and craft knife, cut 1 of the patterned A4 card sheets exactly in half to create 2 identical A5 size pieces.
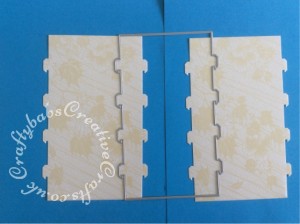
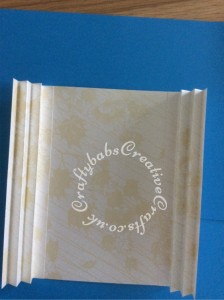
Step 2(a) – Card sides – With stated die
- Using another sheet of the patterned card and the die from the set, die cut 2 sides. Take care when positioning the die as it is exactly 21cm long and if not cut evenly you might have difficulty lining things up when it comes to assembly.
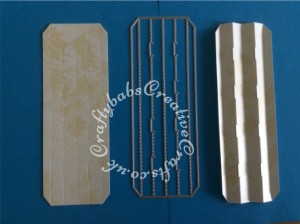
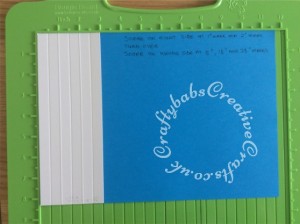
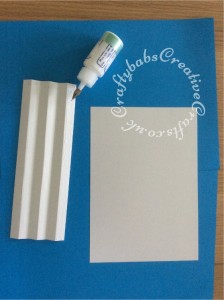
Step 2(b) – Card sides Without die
- Using another sheet of the patterned card cut 2 pieces measuring 21cm x 3″
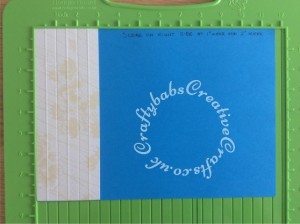
- Place vertically with the right side facing up onto your scoreboard on the side that has 1/2″ increments.
- Score at 1″ and 2″ then turn card face down. Now score on the reverse at 0.5″, 1.5″ and 2.5″

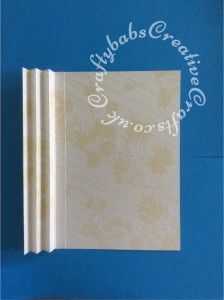
Step 3(a) – Card Internal sections With stated die
- Using the internal section die and the patterned card, die cut 2 pieces.
Step 3(b) – Card internal sections Without die
- Using patterned card measure accurately and cut 2 pieces measuring 21cm x 14.6cm

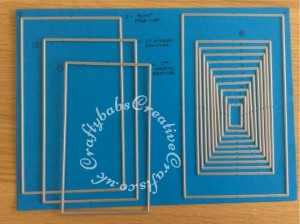
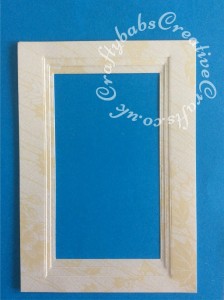
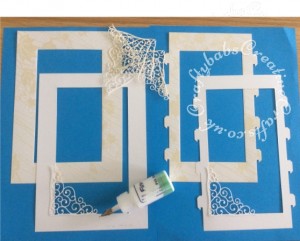
Step 4(a) – Cutting Apertures With stated dies
- Take 1 of the A5 pieces you cut in step 1 and the 2 internal sections cut in step 3, mark lightly with a pencil, the centre points on all sides of each piece. Using the marks you’ve just made and your ruler, mark a cross in the centre of each piece (Note: this will help you centre your dies on each section before cutting).
- Using the nesting rectangles that come in the large panorama set, (I number them starting with number 1 being the largest and number 14 being the smallest) start with the second largest rectangle. Carefully position the die centrally onto the A5 piece of card (there are notches in the die at the centre of each side, line these up with the pencil marks you made and tape the die into place before cutting to avoid any movement.
- Take the third largest rectangle die and position centrally onto one of your inner section pieces as described above, tape into place and die cut.
- Take the fourth largest rectangle die and cut the final aperture in your remaining inner section piece.
Tip: Once cut, your 3 aperture sections should should line up when stacked together with the smallest aperture at the back and the largest one in the front of the card.
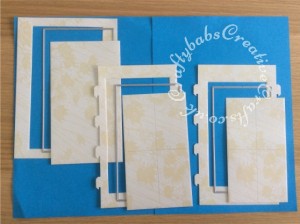
Step 4(b) – Cutting apertures Without dies
- Take 1 of the A5 pieces you cut in step 1 and the 2 internal sections cut in step 3(b), mark lightly with a pencil, the centre points on all sides of each piece. Using the marks you’ve just made and your ruler, mark a cross in the centre of each piece (Note: this will help you centre your dies on each section before cutting).
- If you don’t have Tattered Lace dies, you could use any nesting die shapes that fit into the card pieces for a different look e.g. you could use nesting ovals or circles or fancy shapes.
- If you don’t have suitably sized dies, you can cut the apertures using a craft knife and a ruler. The largest aperture goes into the A5 front piece. The middle aperture is slightly smaller and the inner one is smaller again. The sizes created by the dies I used are as follows; Front aperture 18.4cm x 10.4cm, middle aperture 17cm x 7.7cm and the inner aperture is 15.6cm x 9cm. If you have a centralising ruler it will help you ensure that everything lines up.

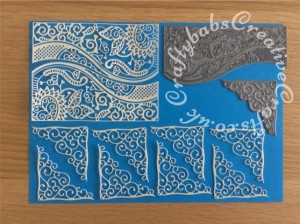
Step 5(a) With stated dies – Cutting Embellishments
- Using dies as stated, die cut the following
- Tattered Lace Double delights adore die cut x 2 from cream pearlescent card
- Tattered Lace Sparkle corner die cut x 8 from cream pearlescent card
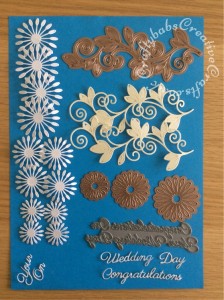
- Spellbinders Blooms 1 die cut 2 x largest flower, 4 x medium flower and 2 x small flower from white pearlescent card.
- Spellbinders Flower bundle set, die cut 2 x large flourish from cream pearlescent card.
- Britannia Wedding Sentiment die cut required words from white pearlescent card.
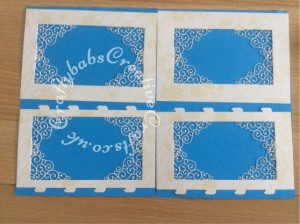
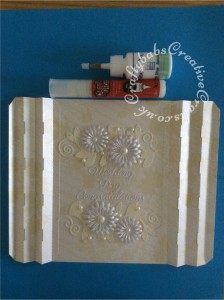
- Glue the Double delights adore die cuts in place on to the card front.
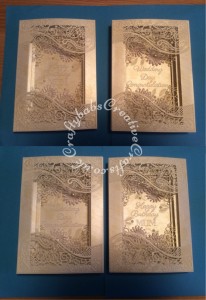
- Glue the Sparkle Corner die cuts into place on both internal sections attaching them by the edges to the reverse side of the card. Glue the opposite corners first then attach the remaining 2 corners overlapping where they cross. Both cards cut with dies and those without are shown below.
Step 5(b) Using other dies or Without dies – Embellishments
- If you don’t have the stated dies you can use any other suitable dies or shop bought embellishments and sentiments instead.
Step 6(a) With stated dies – Flower assembly – Tip: For flower forming, I use an old score-it board but you could use the back of a mouse mat, or flower forming mat or work on a few layers of funky foam.
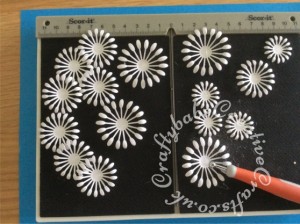
- Using 3mm ball tool for large and medium flowers and 2mm tool for small flowers, emboss the petal ends on all of the flowers embossing on the reverse of the flower. This will make the petals curl.
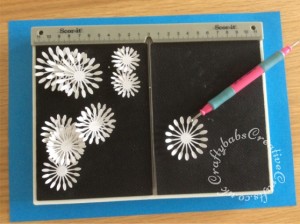
- Turn the flowers right side upwards and using the 6mm ball tool, emboss around the edge of the centre only of each flower. This should give your flowers realistic dimension.
- Assemble flowers putting medium flowers on top of large flowers with petals offset and glue in place with PVA.
- Assemble the smaller ones in the same way with small flowers on top of medium flowers to create 4 flowers in total, 2 large and 2 medium.
- Using Anita’s 3D gloss or glossy accents glue, adhere a flat back pearl to the centre of each flower, 10mm for the large flowers and 5mm for the medium flowers. If you like sparkle you could add gem stone instead.
Tip: I never rely on self adhesive gems and pearls as they invariably fall off so I peel of the sticky bit and use a good glue instead.
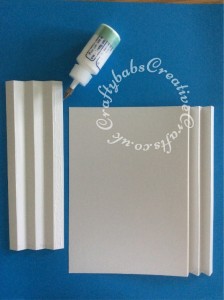
Step 7(a) & (b) With and Without dies – Assembly
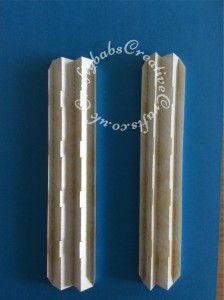
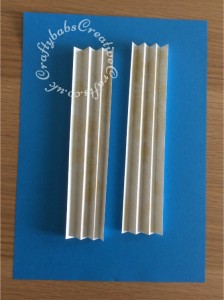
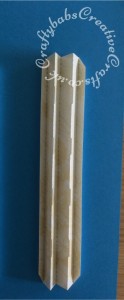
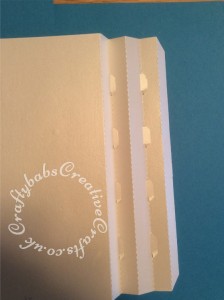
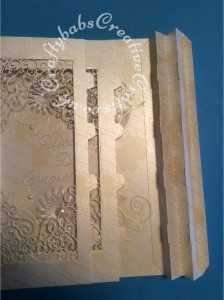
- Take one the side sections you created in Step 2, with right sides together, fold in half lengthwise along the scored/dotted line. Now concertina fold back and forward on each side and reinforce creases with a bone folder. Repeat for the other one.
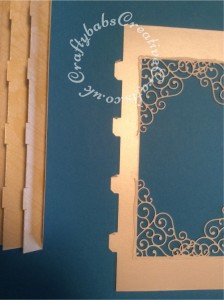
Step 8(a) With stated die – Assembly
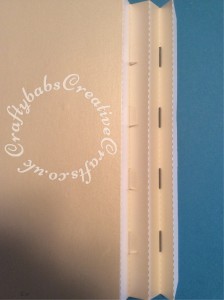
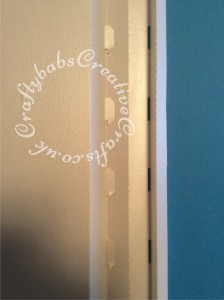
- With the die cut side pieces, you will notice there are slots to insert the tabs of the inner sections. You are now going to attach these side sections to the back piece. It’s important to position the side pieces so that the small extended part of the slot is facing the front of your card. They are both the same when cut so you will need to rotate one of them to create a left and right one.
 LEFT SIDE
 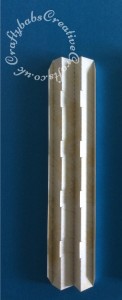 RIGHT SIDE
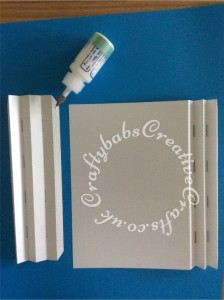
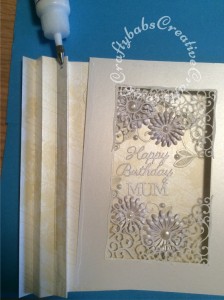
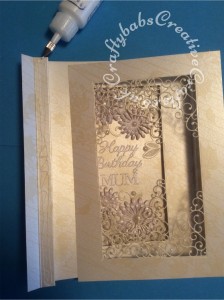
- Apply PVA glue to the reverse side of the right edge of the left side piece and glue into place on the remaining A5 piece of card cut in step 1 making sure that the right side of the card is facing into the card, line up the edge of the A5 card with the first fold in your side piece. See pictures below.
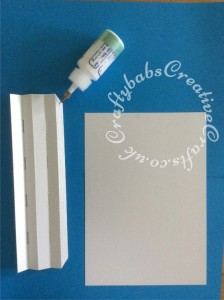
- Now glue the other side piece in place making sure the extended part of the slot is facing the front of the card. See pictures below.
Step 8(b) Without die – Assembly
- Take 1 of your folded side pieces and glue into place onto the left side of the remaining A5 piece you cut in Step 1, making sure that the right side of the card is facing into the card, line up the edge of the A5 card with the first fold in your side piece. See pictures below.
- Now glue the other side in place in the same way.
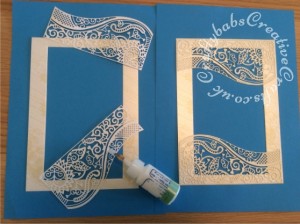
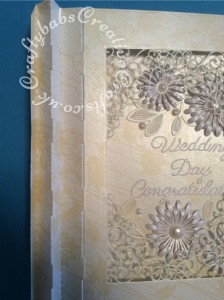
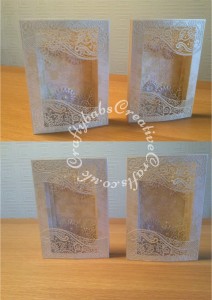
Step 9 (a) & (b) With and Without stated dies – Internal Embellishment
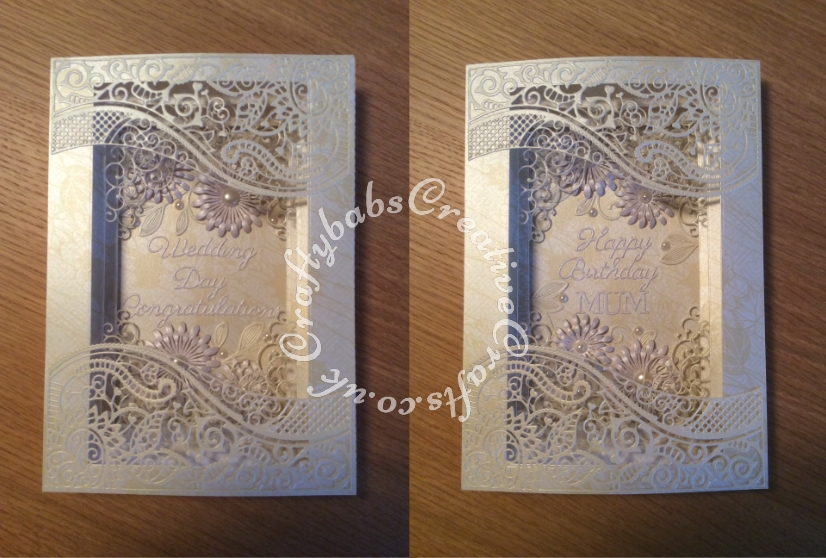
- The pictures below show how I attached the die cut elements to the inside back of the cards. You could use any embellishments here but bear in mind which parts may be hidden by the frames of the internal sections.
- I decorated the card made using the Panorama dies as a wedding card and the one made without the dies as a birthday card so you can compare the final look of each version. I used PVA to attach die cuts and Anita’s 3D gloss to attach extra flat backed pearls.
- It’s important to decorate the back part now as once you put in the internal sections into place you won’t be able to access this part.

Step 10(a) With dies – Assembling internal sections
- Take the internal section with the smallest aperture, with right side uppermost and tabs pointing down, fold back the bottom protruding section of each tab (to allow it to fit easily through the slots in the card sides).
- Insert the tabs on the left side into the set of slots nearest the back of the card, turn the card over and then unfold bottom protruding section to anchor the tab into the slot. See pictures below.
- Now repeat with the second internal section so that both sections are attached to the left side of the card.
- Now insert the tabs on the right side in the same way. Note: It’s much easier to handle doing one side at a time and there’s less risk of damaging the card in the process.
Step 10(b) Without dies – Assembling internal sections
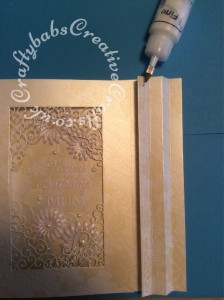
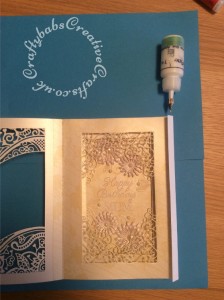
- Take the internal section with the smallest aperture, with right side uppermost. On the left of your card base, fold the first fold of the side section down onto the card base and apply PVA glue to the top surface of this fold. Put the internal section piece into place, lining up as close to the fold as you can (without it stopping the side section from folding), checking that bottom edges are level with back piece and press till glue ‘grabs’.
- On the right side of your card base, fold the first fold of the side section onto the card base, check that the right side of the internal section you’ve just attached will fit into this without affecting the side from folding flat (if it’s bowing, you may need to trim a sliver off before gluing in place) and apply PVA glue to the top surface of this fold just as you did on the left side, now attach the right side of the internal section checking that the side sections will still fold down flat, that bottom edges are all level and hold in place till glue ‘grabs’
- Repeat these two steps using the second folded section of your side pieces and attach the second internal section, left side first, then right side (check no trimming is necessary) as before.
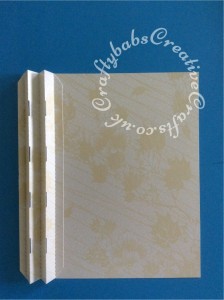
Step 11(a) & (b) With and Without dies – Final assembly
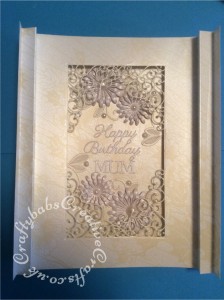
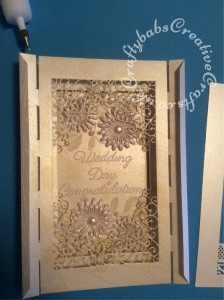
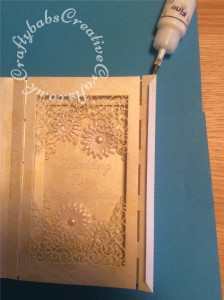
Attach card front by applying PVA glue to final part of left card side piece. Carefully align card edge of card front with folded edge of card side, pressing down concertinas of side piece and checking bottom edges are level with side, back and internal sections. Press and hold in place till glue ‘grabs’.
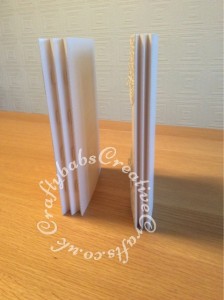
Now repeat on the right side and Violla! you’ve finished. You can add a printed sentiment if desired attached to the back of your card. The card should fold flat for posting.

Final Verdict
- Obviously, I’ve made this type of card before, however up to now I’ve only used the dies. Since I’d had a number of requests for a tutorial, I figured that not everyone would have access to the Panorama die set used so set my self a mission to see if it could be done without them.
- There is little difference between the two finished cards apart from the fact that the one made without dies doesn’t open up to be quite as deep as the one with dies, but I still think the overall effect is just as good.
Words of Wisdom
- If you’re thinking of having a go at this then try it out on scrap card first, especially if you’re not using the dies.
- Accurate measuring is crucial, as is accurate positioning when attaching sides to back, internal sections to sides and front to sides, again, especially when not using the dies. If the bottom edges aren’t level, you’ll have problems getting it to stand up.
- If making it without the dies and you want a more stable card, you could add a fold out stand to the back of the card or make/use an A5 card base as the back instead of just a flat A5 piece of card.
- As always, I would love to hear what you think of this tutorial, if you try it, send me some pics, let me know how you get on, if you spot any typo’s or other errors, please let me know.
Happy Crafting! Babs xxx
Certainly the BEST tutorial I have ever watched. So comprehensive and and explained with perfection. You are very kind to include details re non use of dies also.
I don’t have the LARGE Tattered Lace panorama set but I do have the Tattered Lace Concertina Side and Inner Plates plus smaller dies (inc in set) for sentiments. There are no nesting dies included but I already have some which I can use.
Your card is beautiful and I am going to give it a try. Your work is very inspirational and thank you so much for sharing. You’ve made an old lady very happy.
Many thanks for your kind word, hope it worked out well for you. Would love to see a picture.
Cheers, Babs xx
Thank you so much for such a wonderfully detailed tutorial, and for taking the time and trouble to include those of us who don’t have all the necessary equipment to re-create these beautiful cards.
I was quite disappointed when I realised that my Double Delights die is not the same size as the Double Delights Adore die, so I have stowed away your instructions until I have enough time to re-scale the card to accommodate this!
Many Thanks for your lovely feedback, hope you managed to rescale successfully.
Happy Crafting,
Babs