Tutorial 4 Pentagon Exploding Box Card
I have made quite a few of these cards over the years and they have always been very popular. I would not have considered posting a tutorial until now as I have previously always used a purchased blank card kit to make them. These are now unavailable, but happily, you can now purchase dies to make these yourself. As far as I’m aware, at the moment, only Tattered Lace are making this particular shape and so these are the dies this tutorial is based on. I did find some problems with this set of dies and have come up with some amendments to overcome these, as I will explain at the relevant points in the tutorial.
I have realised, whilst using this die set, that the more experienced crafters out there, would, with a bit of working out, be able to make a template to make these without using a die at all but you would need a set of nesting pentagon templates (see note at the end of step 4 in tutorial). When I get chance I will have a go at producing templates and instructions for another tutorial without the base dies.
For this project you will need the following:
Equipment
- A4 format die cutting machine.
- Set of Tattered Lace Pentagon Box (ETL125) dies.
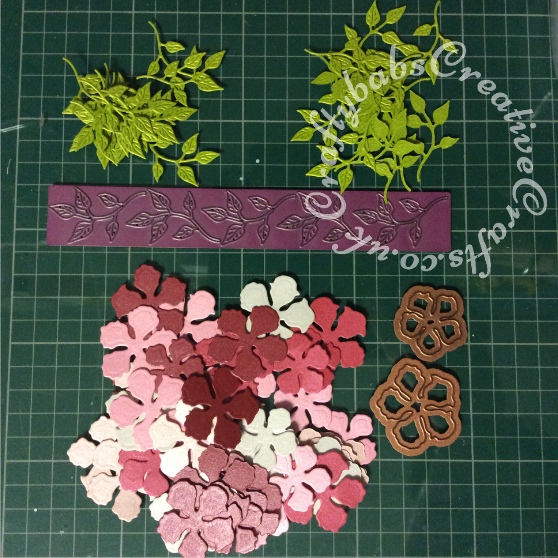
- Flower dies or punches, small and medium (I used Spellbinders vintage floret dies).
- Leaf die or punch ( I used cheery lynn Ivy leaf strip die).
- Small Butterfly dies or punches in 4 sizes ( I used Tattered lace mini dies and Cheery Lynn small exotic butterfly). Check suitability of size against size of box sections.
- Alphabet/sentiment dies (I used Tattered Lace Sentiments 2014 and Cheery Lynn delicate lace script alphabet) – Peel offs can be used in place of these if you don’t have suitable dies.
- Small card die if you wish to include a small card (optional – not essential, you can just fold a piece of card and round the corners, I used a small die from a Quickutz set which is now discontinued)
- Corner rounder punch.
- Leafy border stamp – Optional (I used a border stamp from the My mind’s Eye Bloom and Grow set of clear stamps).
- Score board.
- Bone folder.
- Craft knife/scalpel.
- Metal edge ruler.
- Paper trimmer – optional, you can use a craft knife and ruler if you don’t have a trimmer.
- Ball embossing tools various sizes (I used the tonic flower shaping set).
- Mouse mat or soft embossing surface.
- Scissors.
Materials
- 2 sheets of 300gsm card stock – 1 sheet for card base & lid and 1 sheet for the internal sections in your chosen colour (I used AnnaMarie smooth white stamping card).
- Coloured Card stock for flowers and leaves – (I Used 250-300gsm double sided pearlescent in 5 different shades for flowers and green for leaves).
- Silver Mirror card stock for sentiments, letters & butterflies – half an A4 sheet.
- 34 flat backed diamante gems.
- Strong good quality PVA glue (I always use Brian Clegg black label).
- Glossy accents or Anitas 3D gloss (to adhere gems).
- Distress inks in light and dark of the same colour family ( I used Tim Holtz Peeled paint and shabby shutters).
- Cut n dry foam.
Step 1. Box Base & Lid
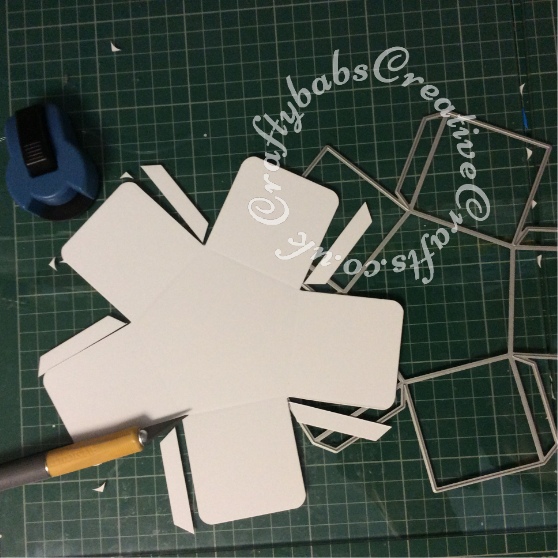
- From white 300gsm card, die cut the box base and lid pieces, you should be able to get both sections from one A4 sheet of card.
- The die will have embossed score lines but I found these to be quite feint, so using a fine ball embossing tool and a ruler I went over all score lines.
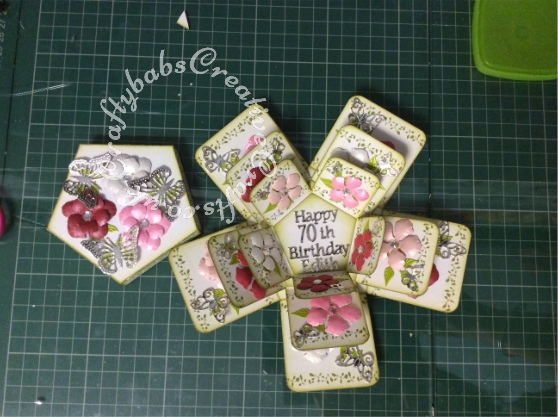
- The box base has extension flaps (needed if making a standard pentagon box) which need to trimmed away to make an exploding box, use a sharp craft knife and a steel edged ruler to remove unwanted sections as shown in photograph.
- Using a corner rounding punch (or pair of scissors and a steady hand), round the top corners on each side of the 5 flaps as shown in the picture
- Fold all score lines and burnish folds with bone folder.
There are dies included in the set for making the internal flaps of the exploding box but I did not like the sizes included or the fact that they result in the internal flaps being rectangular overall not square like the flaps on the outer box (a bit of a mystery as the set includes some nice fancy matting and layering dies which are all square) so I devised my own as follows;
Step 2. Inner sections
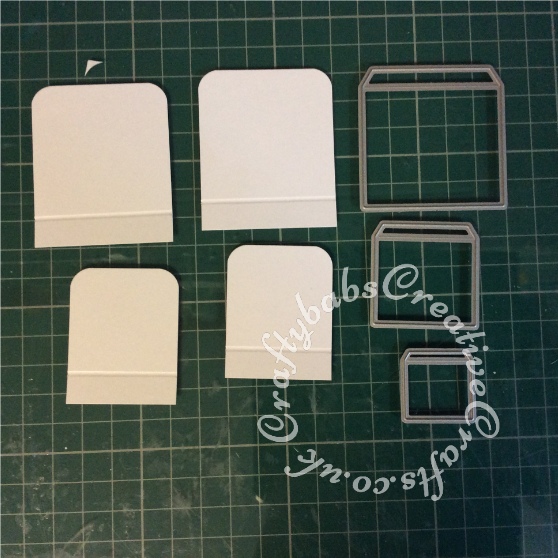
- From white 300gsm card using a paper trimmer, cut 5 pieces measuring 5.6 cm x 4.6cm for the middle layer and 5 pieces measuring 4.6cm x 3.6cm for the inner layer.
- Using a scoreboard, score 1cm from the bottom of each piece so that the top of each middle layer piece measures 4.6cm x 4.6cm and the top of the inner layer pieces measure 3.6cm x 3.6cm (see picture).
- Using a corner rounder, round off the top corners on each side of each piece. Rounding the corners makes it much easier to put the lid on without damaging/bending the corners of the side flaps when the box is finished. A lesson I learned from my first attempt at using this die set.
- Fold along score lines and burnish folds with bone folder.
- Using the Pentagon dies included with the pentagon box set (2nd largest die and 4th largest die) cut 2 pentagons from the same white card.

This picture shows what the dies look like for the inner sections compared to the way described above, I think the shape and proportions achieved by making them yourself look much better than the die cut ones would look.
Step 3. Inking and Stamping
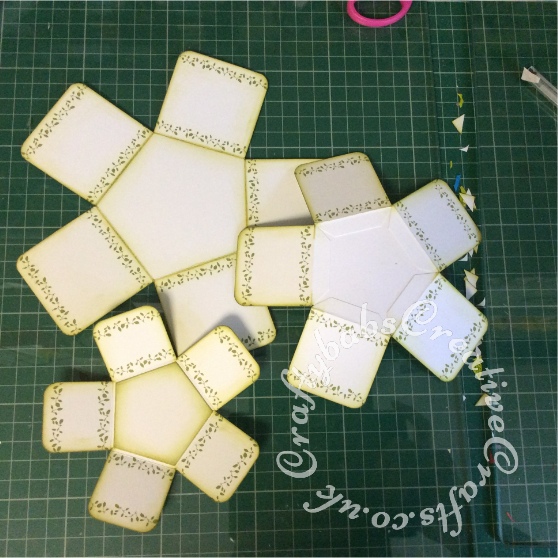
- Using your chosen colour of distress ink and cut and dry foam, ink all edges on each side of the box base. Start with the lightest colour, then just skim the very edges with the darker shade. For this example I used Shabby Shutters first then Peeled Paint.
- Repeat the inking on both sides of all the middle and inner section pieces, but there is no need to ink the bottom edge as this will not be visible (see picture below).
- Ink all edges of the right side of the lid piece but do not ink the reverse side.
- Ink all right side edges only of 2 pentagon pieces cut in step 2.
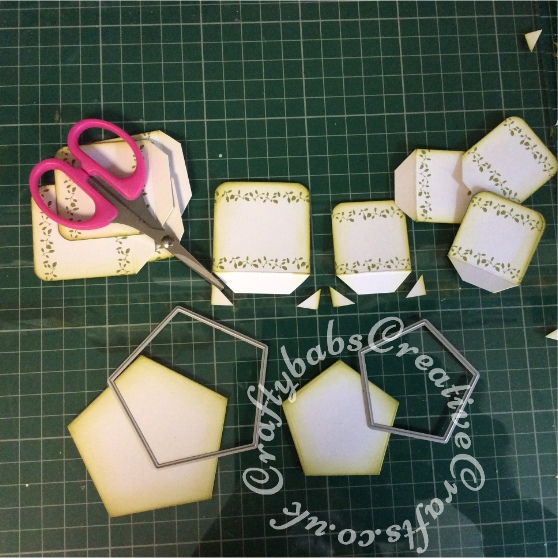
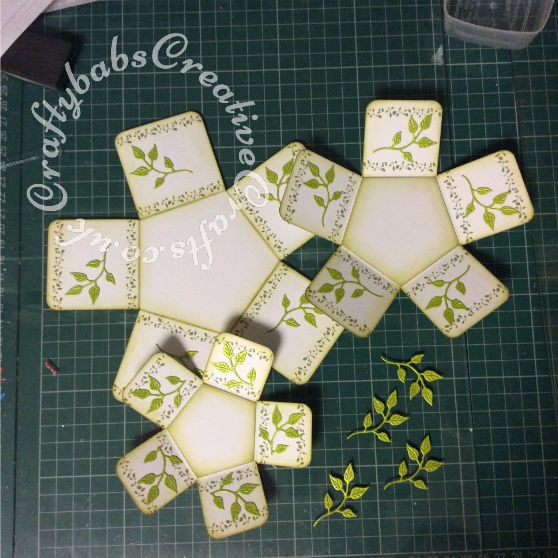
- Using your chosen border stamp, stamp just below the top edge of each of the base side sections and stamp again at the bottom, just above the fold line on each side.
- Stamp the top edges and just above the fold line at the bottom edges on both sides of all middle and inner section pieces (see picture).
- Stamp all outer edges of box lid on right side only.

Step 4. Trimming and fixing middle & inner sections and lid
- Glue tabs on lid to form completed lid.
- Trim the bottom corners of all middle and inner section pieces just below score line at right angles (see picture).
- Glue the 5 small inner section pieces to the reverse of the smallest pentagon and the 5 middle section pieces to the reverse of the larger pentagon (see picture).
Note: This is point where I realised that, with a pentagon template, it would be possible to make the whole box in this way without the need for a special die, although the lid would need to be figured out and I would cover the tabs underneath the pentagons with another pentagon. Maybe I’ll try this at some point and write another tutorial with templates.
Step 5. Cutting/punching, Flowers, Leaves, Butterflies and Sentiments
- Using chosen dies/punches and coloured card, cut 23 large flowers and 23 small flowers (if you want to include a small card inside box you will need to cut 24 of each size of flower.
- Using chosen die/punch and green card, cut 33 leaves (34 if making small card too).
- Using chosen dies/punch and mirror card cut 10 extra small butterflies, 10 small butterflies, 5 medium butterflies and 3 large butterflies.
- If sentiment desired, die cut sentiments checking size to fit into the centre of the innermost section of the box. Note – Peel offs can be used here in place of sentiment dies.
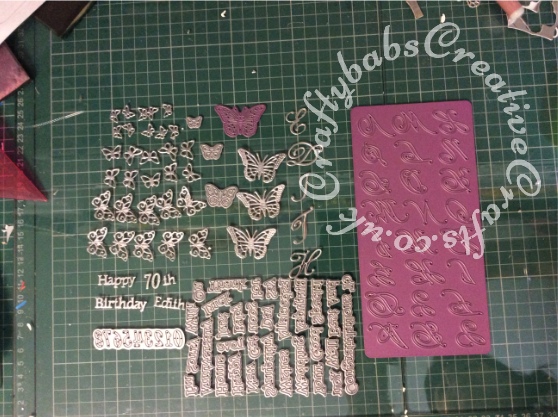
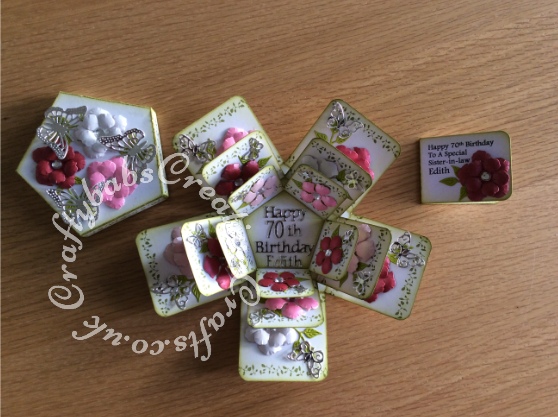
TIP!! – Sentiment dies can be snipped and pieced to form other words, I do this a lot when I want to cut names that match the font of the sentiment or other words not included in the sentiment set. In the picture above I made the name Edith by cutting the ‘E’ from Especially and the ‘ith’ from With, the ‘th’ for 70th was also cut from the word With.
Step 6. Shaping and assembling flowers
- Using ball embossing tools and the reverse of a mouse mat or soft embossing pad, emboss all flowers starting by embossing the reverse of the flower petals to form cup shapes, then turn over and emboss in the centre of each flower (see picture).
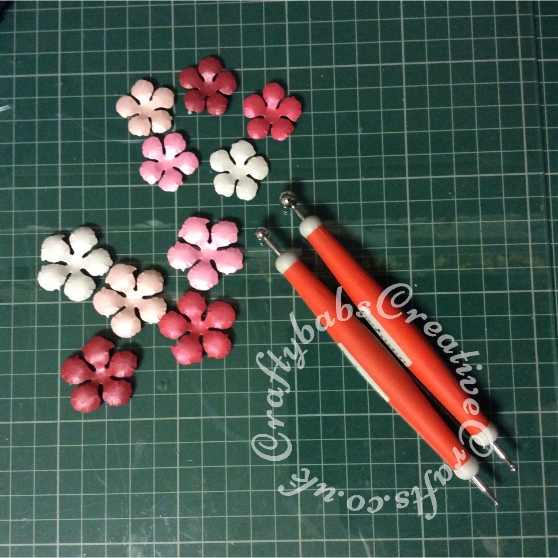
- Make 13 double layer flowers by sticking a small flower (petals offset to fall in between petals of lower flower) into the centre of a large flower using PVA glue. (You will need 14 if making a small card to enclose).
- Using Glossy accents or Anitas 3D gloss, glue a flat backed gem into the centre of each flower. Note- self adhesive gems tend not to stick well and ‘ping’ off.

Step 7. Attaching leaves
- Using PVA glue attach a leaf spray to each side of each section of your box layers
- Attach 3 leaf sprays evenly spaced to the lid.

Step 8. Attaching flowers, butterflies, sentiments and final assembly
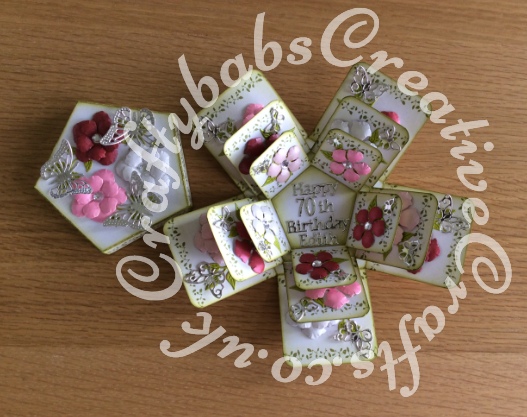
- Take 10 double layer flowers and attach 1 to each side of each section of the base outer box layer. Note – place lid on box before attaching flowers to the outside of the box to ensure that they don’t interfere with the lid when placed in position. Now attach a medium sized butterfly to each inside section only of the base layer of the box (there is not enough clearance to add a butterfly on the outside sections).
- Take 10 large single layer flowers and attach 1 to each side of each section of the middle layer of your box. Now attach a small butterfly to each side of each section.
- Take 10 small single layer flowers and attach 1 to each side of each section of the inner layer of your box. Now attach an extra small butterfly to each side of each section.
- Take 3 double layer flowers and attach to the box lid, evenly spaced between the leaves. Now attach a large butterfly in between each of the flowers.
- Finally, attach sentiment or apply peel off sentiment to the centre of the innermost layer.
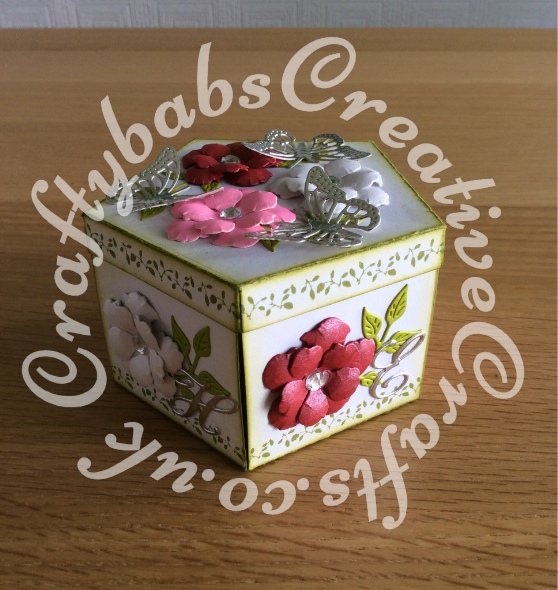
- In the example pictured, the recipients’ name was conveniently 5 letters long so I added the letters of the name, 1 letter to the each of the outer sections of the base layer.
- Finally, glue the middle section of the box into place ensuring that you place it centrally, it helps to hold all the flaps in the upright position when placing it in situ as you will be able to check you have the same sized border on all sides.
- Now glue the innermost section in place in the centre of the middle layer in the same way and hey presto! you’re done.
- The only thing to add if you wish, is a small card so that a message/greeting can be included as there is nowhere to write one on this type of card. I usually do this and decorate with a double layer flower and leaf.
I hope you enjoy this tutorial. Please feel free to add a comment, question or opinion. Happy crafting. Babs xx