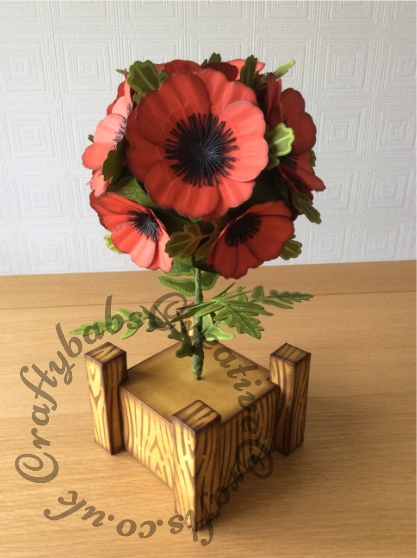
Once made, these dimensional poppies can be used for a variety of card making, gift giving and home décor projects like the poppy topiary tree shown below. The topiary tree was a blank white kit I bought a few years ago from ‘everycraftsapound’, unfortunately they don’t make these any more. When I get chance I will figure out a template to recreate something similar and post it as a tutorial. Heads up, if you missed Simply Cards and Papercraft issue 140 it’s on sale at reduced price from http://www.moremags.com/bargains/papercraft-bargains/issue140-simply-cards-papercraft
Before you start this you will need the following;
- Red card stock (I used 250-300gsm)
- Black card stock for flower centres (or centres could be drawn in with a black marker pen)
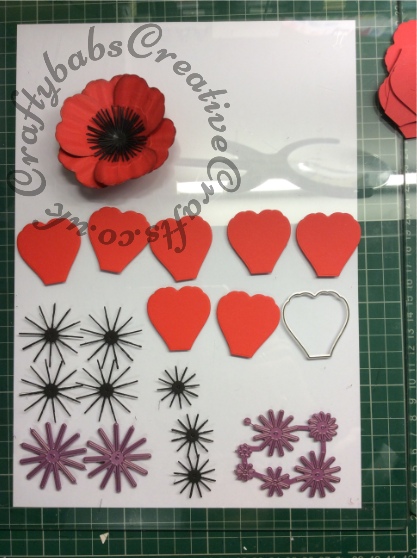
- Free die set from Issue 140 of Simply Cards & Papercraft or similar shaped petal dies
- Stamen dies or punch (I used dies from the Cheery Lynn Build a Flower set) note:- not needed if drawing in centres.
- XL, L & medium sized ball embossing tools ( I used tools from the Tonic flower shaping kit and another large tool), I also used the Marion Smith Bloom Impressions Flower shaping tool
- A soft embossing mat (I use a rubber backed mouse mat)
- Black distress ink
- PVA glue
Step 1
- Using your preferred size of petal (the set comes with a large and a smaller one) and either stamen dies or punch, cut all the petals and stamens you need. For each poppy you will need 6 petals all the same size and Stamens, I used 4 large stamen die cuts and 3 medium ones for each flower but this is down to your own preference, you could even draw in the black centres with a marker and/or fine line pen but the die cut stamens give the finished flower more dimension.
Step Two
- Using a medium sized ball embossing tool (3rd size up of the tonic set) and starting on the reverse of the petal, emboss 4 evenly spaced lines, one down each edge following the petal shape, and a further two lines evenly spaced in between. Press firmly as you go, you and if necessary, keep going over your lines to get the dimension you prefer.
- Turn your petal over with the right side facing you and the same sized tool, emboss in between the lines you have just created, 3 lines in total (see picture below).
- Repeat this on remaining petals (6 for each flower).

Step Three
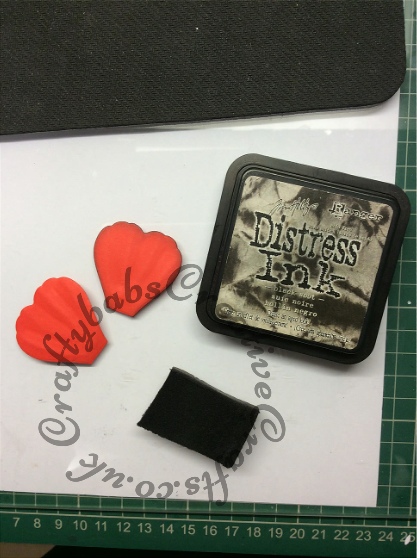
- Using black distress ink and either a blending tool or some cut and dry foam, lightly ink all round the outside edges of each petal.
Step Four
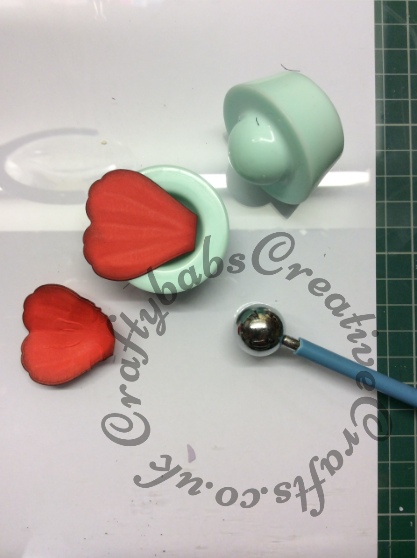
- Using either a Marion Smith Bloom Impressions Flower shaping tool or an extra large ball embossing tool into the palm of your hand, shape the narrow centre part of the petal to form a cup shape (see picture below) and repeat for all petals.
Step Five
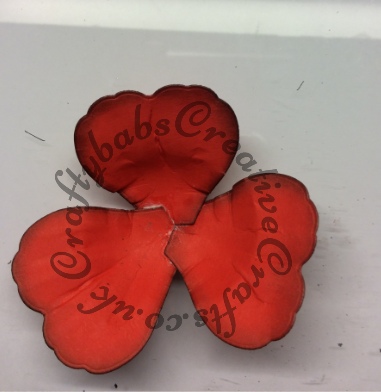
- Take 3 petals and using PVA glue, apply a small amount to the same corner on each of the 3 petals (see picture).
- Join the 3 petals together, overlapping the corners as shown in the picture.
- Repeat with another 3 petals.

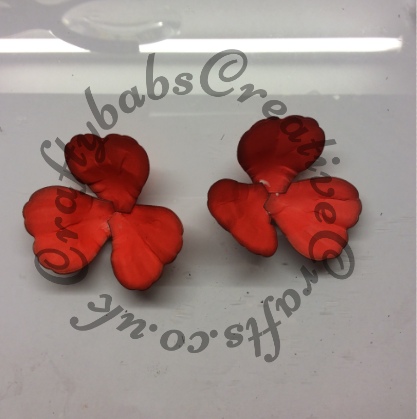
Step Six
- Take two sets of 3 petals and again, using PVA glue, adhere one on top of the other, arranging them so that the lower set of petals lie in between the upper set.
- This is the main base of your poppy. If you don’t have stamen dies or punches, or simply prefer not to have dimensional stamens, you could use black markers or fine liner pen to add the stamen details to your flower.
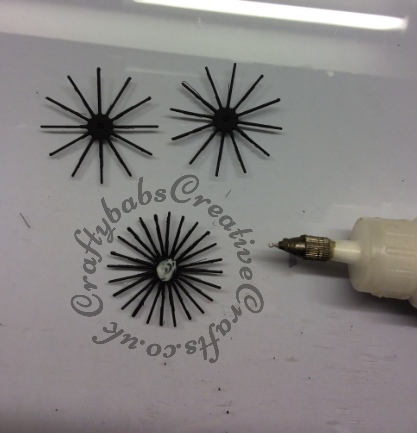
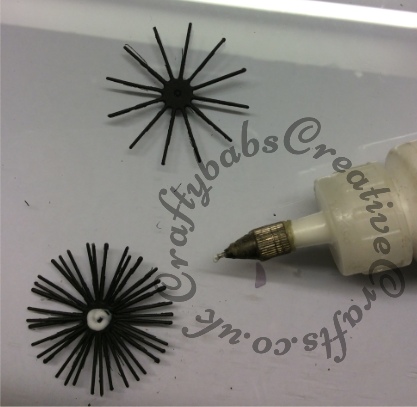
Step Seven
- Take 2 of the 4 large stamen die cuts and glue together using a small amount of PVA glue leaving an even space between the stamens.
- Glue the third die cut on top between those already glued and then glue the final die cut in place filling I the last spaces.
- I love the Cheery Lynn stamen dies they are so fine and add superb, realistic detail.
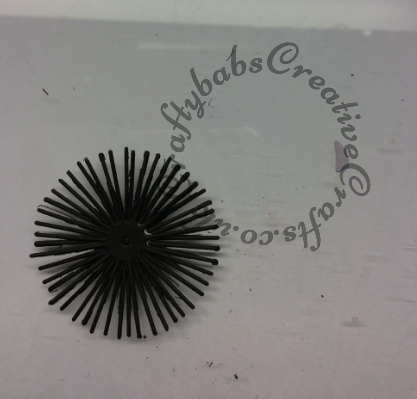
Step Eight
- Now layer the 3 medium stamens on top of each other, gluing each layer, spacing them evenly between one another.
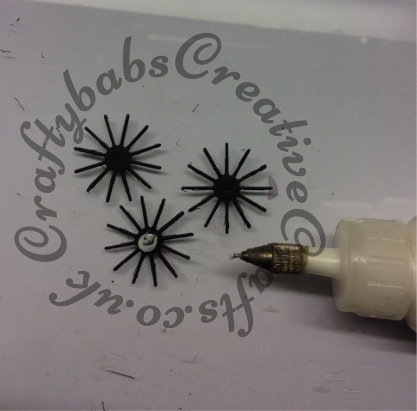
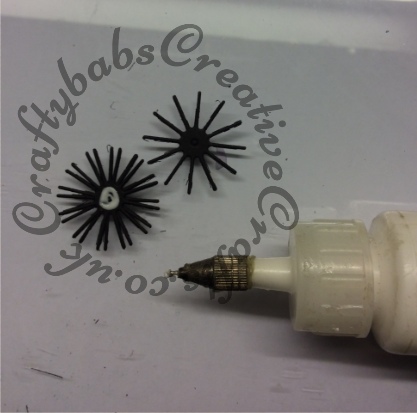
Step Nine
- Using the next size up ball tool from the one that you used in step 2, place the large stamen section in the palm of your hand and emboss with the tool to cup the centre of the section.
- Repeat the same with the medium stamen section using the same sized tool used in step 2.
- Using a small amount of PVA in the centre, glue both sections together.


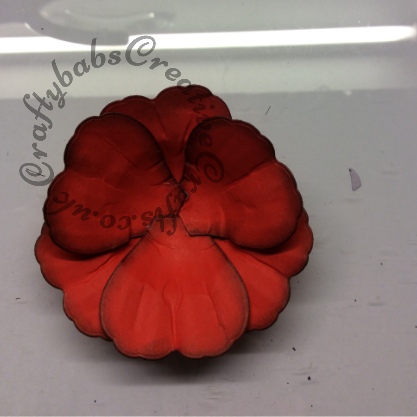
Step Ten
- Finally, glue your completed stamen section into the centre of your flower and Hey Presto! you have the perfect poppy, no watering required.

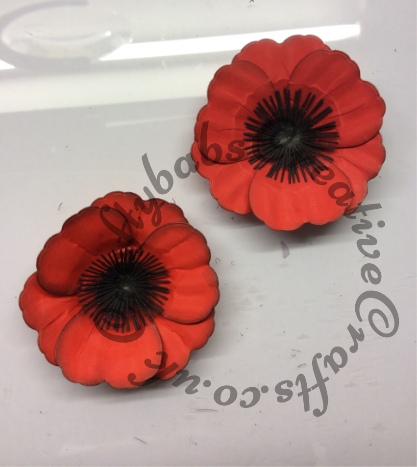
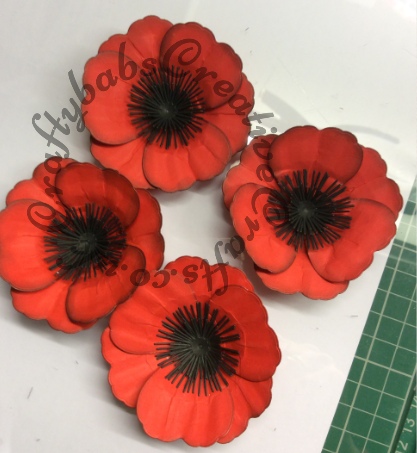
The completed flowers can then be used on all kinds of crafting projects from Dimensional cards, photograph/picture frames or, if you add stems and leaves, they could be displayed in a vase or floral arrangement. I added mine to a shop bought topiary tree kit which I inked and stamped in green and added leaves to make the poppy tree shown. I used the smaller petal in the set to make the poppies on the lower section of the tree in the same way as the larger ones, I used the medium and small stamen dies for the smaller flowers.
The same techniques could be used with any shaped petal dies to create different types of dimensional flowers. These same dies would also make the most fabulous anemones too.
Hope you enjoy making these as much as I did.
Thank you for stopping by and don’t forget to leave a comment to let me know what you thought. All feedback is greatly appreciated. Why not sign up to my news letter for a heads up on when new tutorials are added.